Sunday, 6 March 2016
Wednesday, 17 February 2016
Editing Reflection
Film editing is
part of the creative post-production process of film making. The term film
editing is derived from the traditional process of working with film, but now
it increasingly involves the use of digital technology. As one of the film
editors I had to work with the raw footage, selecting shots and combining them
into sequences to create a finished motion picture.


In our first editing session, we were given a quick reminder
of how the editing process works, some rules and tips on how to approach the
editing and then a reminder of how to use the editing software; Adobe premiere
pro. We began by watching though all of our footage, the technical term for all
of the shots we have is called the rushes, and so be began by watching all of
our rushes. This was important as sometimes what you think you shot on the
shoot day and what you actually shot on the day.

We then started piecing
together shots and selecting shots and beginning a logging process. Logging
involves collecting all of the desired rushes and spacing them out into a very
rough idea of the flow of the narrative of the final piece. This is usually
used in the professional industry so that if anther editor is brought into the
project then they can watch the timeline and have an idea of what the narrative
is and where the story is going, whereas if you just start editing from the
beginning then this makes things difficult for other editors on the project.

After beginning to piece together our footage and begin the
logging process we discussed our ideas of what we wanted the sense of the scene
to be and what order would work best for the shots we had. We did this by
watching back the shots and deciding where in the narrative the shot would work
best or whether it would work well at all. We referred back to our original
idea using our shot list, storyboard and scene outline. However, some of our
ideas had started to change as we began the editing process and we discovered new
ways of interpreting our footage and we discussed various options.

In our second session, we began by watching back our progress
from the previous session and discussing what we were going to do next.
Before we continued to piece together our shots it was
important that we made a duplicate of our first session, which would be entitled
our first cut. This ensures that we have a safe copy of what we did last time just
in case we want to go back to our original or in case we lose anything we know that
we have it backed up in a different cut.

When logging some footage of the psychopath that we intended to
use at the beginning of our sequence we discovered some continuity issues with
these shots. Unfortunately, our actor had done different actions in different
shot and this created some issues with the continuity of the scene. I suggested
t the group that we can avoid these issues by cutting between the psychopath
and the victim and that way we can avoid the continuity issues as the audience
won’t question whether the psychopath changed hands when carrying a torture
weapon or if is facial expression or positioning has changed because he may have
moved or changed during the cut to the victim. This aided us in avoiding the continuity
issues and still being able to use lots of the various shots that we had of the
psychopath. This then led us to create a new edit of the psychopath’s entrance
using different shots and using my idea of cutting between the psychopath and
the victim to avoid continuity issues.

In our third session, we again began by watching over our
progress from the previous session and then discussing as a group what are
targets were for this session. I suggested that we started logging the
inspector scene and so we began piecing together the rushes from this scene,
including a variety of angles and cutting between different shots. We discussed
as a group what would work best and then we worked in turns at editing the
shots and bringing the rushes down into the timeline.

We then discussed a possibility of a change to the ending of
the sequence. We discovered a very effective and captivating shot of the psychopath
putting out a match using his tongue. I suggested that this would create a much
more dynamic, effective and possibly a much more thrilling editing to our sequence
than our original idea of the psychopath’s hysterical laughter blowing out the
candles. We took some time discussing the possibility of a new ending although
we left this decision until further along in the process to see whether it
would work best with all of the other footage.

The next stage to the post production process is to continue logging and then start cutting and editing the shots in more detail. Our targets for the next few sessions is to finish the logging process, start to edit the shots at more in depth detail and finally we need to discuss our opinions and thoughts on the possibility of a new ending to our opening scene and whether we want to stick with our original idea which was to have the psychopath blow out the candles with his hysterical laughter or whether we wanted to change our idea slightly and use the highly effective shot of him putting out the match with his tongue.

In our fourth and fifth sessions we started off by watching back our progress from the previous lessons and discussing our plan of action for the two sessions. We continued to edit the scene between the inspector and psychopath by cutting between the two characters using the razor blade tool to cut the shots in half and this allowed us to add shots in between. In addition to this we also made a duplicate of our second cut and started working on a third cut and this allowed us to save a copy of our previous work but also start editing a new version to see the opportunities we had and different options we could create. In the next session we need to start considering the audio and what we are going to do in terms of soundtrack and dialogue.

In our sixth session, as with all of our sessions we began by watching back our timeline and reminding ourselves of what we did in the previous session. We then made a duplicate of our third cut and after some discussion we decided to make a clean cut of our third cut. We decided to do this because our previous cut was very rough and messy and some of the audio clips didn't match up correctly with the video clips. We rearranged our clips so that we alternated between having a shot on V1 for the video and A1 and A2 for the audio for that shot and then the next clip would be on V2 or V3 with the audio on A3 or A4. This allowed us to organise our shots in a much more efficiently manner which will make the process a lot easier when we begin to work more on the audio including soundtracks and dialogue. We also, in this session sorted out some more continuity issues and deleted some of our shots by trimming them down or simply removing them from the timeline. In the next session we need to continue with the trimming and cutting process and also discuss our ideas for the audio and titles part of the post production process.


We started off our first session by reviewing and selecting our shots and in all of the following sessions we start by watching over our progress on the timeline. We decided to review an select our shots to remind ourselves what we had shot on our shoot day as often during this process what you think you filmed and what you actually filmed can be very different. We also decided to start the process by logging our shots as this way we were able to get a rough idea for the flow of our narrative.


We decided to crop some of our shots and we did this to avoid continuity issues in some cases and also to add to the suspense of he thriller by using quick, short shots which would provide a better dynamic to our opening sequence than if we left the shots as they were originally filmed.


In our fourth and fifth sessions we started off by watching back our progress from the previous lessons and discussing our plan of action for the two sessions. We continued to edit the scene between the inspector and psychopath by cutting between the two characters using the razor blade tool to cut the shots in half and this allowed us to add shots in between. In addition to this we also made a duplicate of our second cut and started working on a third cut and this allowed us to save a copy of our previous work but also start editing a new version to see the opportunities we had and different options we could create. In the next session we need to start considering the audio and what we are going to do in terms of soundtrack and dialogue.

In our sixth session, as with all of our sessions we began by watching back our timeline and reminding ourselves of what we did in the previous session. We then made a duplicate of our third cut and after some discussion we decided to make a clean cut of our third cut. We decided to do this because our previous cut was very rough and messy and some of the audio clips didn't match up correctly with the video clips. We rearranged our clips so that we alternated between having a shot on V1 for the video and A1 and A2 for the audio for that shot and then the next clip would be on V2 or V3 with the audio on A3 or A4. This allowed us to organise our shots in a much more efficiently manner which will make the process a lot easier when we begin to work more on the audio including soundtracks and dialogue. We also, in this session sorted out some more continuity issues and deleted some of our shots by trimming them down or simply removing them from the timeline. In the next session we need to continue with the trimming and cutting process and also discuss our ideas for the audio and titles part of the post production process.

The intended outcome of this process is to
create a two minute opening sequence to a thriller film using a range of
different technologies and software as well as gaining more knowledge about the
editing process and post production in general.

It was important that I made some key
decisions for the group during the editing process. One of these decisions was
the idea to change the ending of our opening sequence to the use of the
effective shot of the psychopath putting out the match with his tongue rather
than our previous idea which was to have the psychopath's hysterical laughter
blow out the candles. I decided to do this as this was a much more thrilling and
captivating sot and in my opinion it would serve much better than our original
idea at creating an effective and shocking image for the audience to be left
with. Another key decision that I made was the decision to start our opening
sequence with a shot of the psychopath rather than the victim's feet, as in our
original idea as just like in the previous example I believed that this would
serve as a much more effective and striking opening image for the audience as
well as establish the mood and atmosphere of the scene and create suspense
right from the beginning.

There were some expectations set up about the
editing before I started the process on one which was to constantly save the
project to avoid loosing any of the work we had done and in addition to this we
were expected to make duplicates of the shots and make several cuts of our
opening scene. This enabled us to save what we had done so far and then start
doing something different with the footage whilst keeping a copy of our
original cut in case we wanted to return to the original idea. Another
expectation that was set up about the process was that because this project is
done in groups it was important that we shared the workload equally between the
members of the group, that way we could ensure that every member of our group
had a chance to explore the technology and software as well as having the
opportunity to contribute to the final copy. Time management was also one of
the expectations that was set up before we started as we knew we would have a
very limited time to edit our opening sequence and so it was important that we
used the time that we were given very wisely to ensure that we got everything
done to the best standard it could possibly be. This also meant that we were
expected not only to edit in our lesson time but also to use the edit suite and
software available in our spare time in order to ensure that the project would
be finished on time.

The technology that we will be using during
the post production process are Adobe premiere pro, Sound editing software such
as Garagebands and Soundclouds as well as font and titling softwares.
We started off our first session by reviewing and selecting our shots and in all of the following sessions we start by watching over our progress on the timeline. We decided to review an select our shots to remind ourselves what we had shot on our shoot day as often during this process what you think you filmed and what you actually filmed can be very different. We also decided to start the process by logging our shots as this way we were able to get a rough idea for the flow of our narrative.

The timeline is used to combine and order the
shots. We used a timeline when ordering our shots as you can separate the shots
into audio and video. it also, as the name suggests gives a guideline as to what the length of each shot is, which
in turn gives you an indication of how long the entire opening scene is.
We decided to name our clips and we know that
naming our clips would make it easier to find what we were looking for and it
is also a good method of organising the shots, which makes the process go a lot
smoother.
The framing of the shots did influence
whether we used the shot or not as we wanted to use a range of different camera
angles and movements to add variation to our opening scene but we were also
aware of how we could use the connotations behind each of the different camera
angles in order to help get across some character information or information
about our narrative to the audience which would make our choices of frame and
angle more effective.

We decided to crop some of our shots and we did this to avoid continuity issues in some cases and also to add to the suspense of he thriller by using quick, short shots which would provide a better dynamic to our opening sequence than if we left the shots as they were originally filmed.
In addition, we also used some cutting tools
including the blade and the razor and this digital tool allowed us to either
cut down the footage or split the footage into two. We used the razor tool to
cut the footage at a particular point which allowed us to either split the
footage into two parts or to make it easier and more accurate to cut part of
the shot.

So far we have created a rough cut of our
opening sequence to the thriller and the next stages are to look at sound,
transitions, title sequences and finally to have a closer look at continuity
issues. So far I am really pleased with my groups progress and I believe that
we have made good headway in the post production and editing process.
Thursday, 4 February 2016
Behind The Scenes Full Write Up
In this post, I am going to
be discussing the behind the scenes elements of our thriller film, including
what went well, what didn't work well and how we changed it and what did we
change.

One of the things that
worked well was our original idea and we were able to stick with the majority
of the original ideas, which worked well because it meant that the
pre-production and production work coincided. Another element that worked well
was my work on the sound boom and also as the director, because I was paying
attention and listening to instructions and coming up with new ideas. In
addition to this, Coming up with new ideas and adapting our scene outline and
shot list to work best with the set and the layout of the church was another
thing that worked well as it meant that we were able to utilise the location to
the best of our ability and we worked well as a team discussing how we could
adapt the scene to work best with the location. In my opinion, the actors were
very good at listening to instructions and also came up with ideas of their own
to contribute. An example of this is when Mike, the actor who played the role
of the psychopath started singing 'It's beginning to look a lot like Christmas'
in a very creepy and psychotic tone, and so we decided to add this in at the
beginning of the scene when he enters. This is an example of one of the
elements within the opening sequence that we changed but from my point of view
this work effectively and was an asset to the sequence. The final element that
worked well was the mise-en-scene of the location which was really good and the
costumes worked really effectively in creating the right look for the film. In
addition to this the fake blood and scar looked really effective on camera and
so this was one of the strengths to our shoot day.

However, there were also
elements that didn't work well, but as a group, we found ways around it and
dealt with the problems and found solutions. One of the elements that didn't
work well was the fact that the church was very cold and our actress was just
wearing a white summer dress and so she was very cold but we were able to deal
with this by giving her a jacket or a blanket between takes so that she didn't
get too cold. Another element that didn't work very well was the fact that at
times our communication as group could have been better as we had different
ideas about what would work better but we were able to sort this through
discussion, compromise and listening to each other’s ideas an supporting those
ideas. Finally, one of the last elements that didn't work as effectively as we
had hoped was the retractable knife was quite bad in terms of quality so we tried
to cover up the parts of it that looked quite fake and unrealistic and we also
had to bear in mind that this part of the film needed to be rehearsed a few
times without the camera before we added the fake blood because we only had one
shirt for the character and so we needed to work out the logistics of this shot
before we added in the fake blood and so we were only able to film this shot
once.

There were quite a few
elements that we had to change, either because when we got on location we
realised that they wouldn't work very well or when we arrived on location we
came up with new additions to add to the original idea to enhance it. Firstly,
we changed the order in which the shots were filmed due to the availability of
one of our actors being limited on the day and in addition to this we also
needed to bear in mind that some of the shots needs to be left right until the
end of the shooting, such as the use of the fake blood and the candles for
continuity reasons. We also made some adaptations to the scene outline in order
to use the location to our advantage as there was small ally way entrance that
we decided to use for the psychopaths entrance. The final element of our
opening sequence that we changed on the day was the addition of a song at the
very start of the scene. Mike, the actor who played the role of the psychopath
started singing 'It's beginning to look a lot like Christmas' in a very creepy
and psychotic tone, and so we decided to add this in at the beginning of the
scene when he enters.
The day before our shoot day
I had arranged with the actors, through an email, to get them to bring in their
costumes to check that we had everything that we needed and also to ensure that
we avoided any last minute panic if the actor didn't bring in the costume that
we needed.

Another thing that I organised the night before the shoot was making
sure we had all of the props that we needed. I made a list and then ticked it
off when i knew I had it ready for the following morning. This worked very well
as it meant that we were organised and ready on our shoot day. Finally, I
decided to print out a copy of our scene outline, shot list and our storyboard
to take with us on the shoot day. This ended up being very useful as it meant
that throughout the shoot day we could refer back to our original idea and it
also made sure that we shot all of the things we intended to film.

Before the shoot I had
organised the costumes, props, location, scene outline, shot list and
storyboard were all ready for our shoot day. It was essential that we had
everything ready in time for the shoot day so that there was no last minute
panic. I prepared all of this through emailing the different people involved
including members of my group, the cast, the secretary at the church and the
costumes and props department at school.

When we arrived on location,
we had a look around the church and discussed where the best lighting was, the
best acoustics and also what would look best on camera. We moved some of the
furniture around, however we were very careful as it was authentic to the 14th
century and we ensured that we returned it to the correct location afterwards.
We already had most of the things we needed in terms of props and costumes but
we just needed to make sure that the logistics of our scene would work in the
space. Once, we had decided whereabouts in the church we were going to shoot we
did a few rehearsal runs of the scene, without the filming equipment, just to
check that it worked and that the actors knew what they were doing.

One of the main things that
took time at the start of the shoot was the makeup for the scars ad wounds on
the victim. We had to ensure that these looked realistic on camera and they
took time because they needed a lot of minor details in order to make them look
effective. Setting up the camera equipment also took some time because we had
to bear in mind when setting up the camera, where the best lighting would be
and we also had to ensure that we would get everything in frame when shooting.
Something else that took time at the start of the shoot was informing the actors
about what the scene was about, giving them a bit of detail about their
characters and also running their lines with them.

From my point of view one of
the most difficult elements of the shoot was communication because at times we
were not all on the same page and I believe that this slowed down the process
at times. However, we worked through this by listening to each other ideas and
taking into account what the other members of the group wanted to do to ensure
that everyone was happy with the final product. Another element that proved to
be quite challenging on the shoot day was the continuity of the scene as we had
to ensure to bear in mind the 180 degree rule when turning the camera round to
get a different angle of the scene. Continuity also proved to be a problem with
the use of the fake blood and he candles, as these shows could only be filmed
once otherwise, there would be blood on the psychopath's shirt already and the
level of wax would have decreased. This made it difficult because we had to make
sure that everything was set up so that it would all go smoothly in that one
take.

I really enjoyed seeing all
of our ideas come together into the final product and witnessing the
development of our idea come to life on set. One of the elements that I
particularly enjoyed was using the sound boom as this was something that I had
never used before and so it was really interesting getting to learn more about
how the sound boom works. I also thoroughly enjoyed playing the role of the
director and calling 'quiet on set' and 'roll camera' as this gave me a sense
of pride and control over the project and I really enjoyed helping the actors
understand more about their characters and giving them instructions in order to
make the scene come to life.

Overall, I think we worked
well as a group, as although there were some minor communication difficulties
along the way, in the end we were all really pleased with the work we had done
on set and we all felt a sense of pride about what we have collectively created.
I believe we all took on our roles very well and we all thoroughly enjoyed
seeing all of the pieces being put together and watching our creation and idea
come to life.

Mise-en-scene Video Notes
Here is the script that we used for our video:
Hello everybody, today I am going to be talking to you about my monthly mise-en-scene favourites. This is the month of November and so these ideas would all be great for Halloween season which works well with the thriller film idea. This month there have been a lot of things that I have really enjoyed using from costumes, to locations and even props. This months theme was thriller films and so i have really been trying to capture the encaptivating and mysterious look that comes with a thriller film.
One of the things I have really been enjoying this month is costumes. One of the looks I have been really enjoying is the hostage victim look because you can really capture the vulnerability and innocence of this type of character through a white dress which provides connotations of youth, purity and naiveity.
This look works best with a short white dress because the colour white shows the connotations of innocence and vulnerability. The fact that you are wearing white definitely provides denotations that you are a victim and this works well with the genre and conventions of a thriller film.
This look, achieved with a white dress provides a sense danger to come and the fact that the particular dress I chose to wear had lace on it added to the vulnerability and innocent youthfulness created with this look. The adhering stereotype of the victim in white works really well for this look.
However, the issue with wearing this look during the winter months is that you will be really cold and so it is important to accessorise the look appropriately, with a matching jacket or a shawl. It is important that you also consider wearing tights to keep your legs warm.
Another look in terms of costumes that I have really been enjoying wearing this month is the psychopath look, however this look works better on males. You can achieve this look through a white smart shirt, black suit trousers, smart black shoes and a black winter coat. This look, at first glance appears to be a subverting stereotype because someone with a crazed mind is wearing such smart clothes, which would usually be a representation of a business man. This look can be made to look like a psychopath through minor details such as a non-ironed shirt which is crumbled up and shoes which have mud on them and have been scuffed up.
This costume provides connotations of someone who is going to do a business deal, however in this circumstance it is someone who is dealing with a negotiation over a hostage.
The problem with this costume is that it can sometimes be mistaken for a different type of character as it is a subverting stereotype. It can appear too smart on camera, and sometimes a more casual and scruffed up costume would work more effectively at providing sufficient connotations for the character of a psychopath.
The final look that I am going to be showing you today is an inspector/negotiator. This look can be achieved through a smart suit, a fedora style hat and a black trench coat. This provides an adhering stereotype, as the smart and business like style of this costume connotates that an inspector is work driven and conscientious.
The use of the dark colours of the suit and a boring tie gives a slightly dated look to this character's costume and it also provides connotations of a uniform look to the costume. The colour connotations behind the dark colours of the suit suggest that the inspector is harsh, has high authority and also that they are used to dealing with the bad guys, such as the psychopath mentioned earlier.
The problem with this costume is that the dark colours could provide connotations that the inspector is the villain, which would be an incorrect representation of an inspector. Another thing which could cause problems, is the use of the dated suit could connotate and generalise that all inspectors are old fashioned and have dated opinions and methods of negotiating.
Another area of mise-en-scene I have been enjoying recently is props, as these can add to a character's costume to make them more dynamic and add more character detail as well as provide genre connotations.
One of the particular props that I have been enjoying recently is a retractable knife. I prefer retractable knives because they add to the connotations of danger and suspense, whilst also being a very safe prop to use as they cause no harm to the actors using them. It is important to ensure that a retractable knife looks realistic on camera, as if it looks tacky and fake this could affect the mise-en-scene. Knives are a suitable prop for a thriller film because they provide an adhering stereotype of danger, violence and death. The issue with using the props of knives is that you have to ensure that they look realistic on camera, however when in public, they cannot be mistaken for real knives and really they should not be used in the public because of the assumption that they are real. Another disadvantage of using a knife prop is that they will not cause any harm to the actor and that the material will not hurt the actor.
Another prop that provides great mise-en-scene in a thriller film is torture weapons to be used on a victim. This is an adhering stereotype as torture weapons provide connotations of harm, danger, violence as well as creating suspense and atmosphere. However, when using the prop of a torture weapon, as with a knife prop, you have to be careful when in public that they are not mistaken for being real and not a prop, also you need to ensure that they do not cause harm to the actor and that they are safe to use.
A prop that I find works really well for a torture victim or hostage and would work well with the white dress are duct tape and rope, these can be used for muting the victim and tying up their wrists or ankles. These props provide adhering stereotypes as they are usually associated with torture and hostage situations. The connotations behind these props are that they are being used to make the victim vulnerable and not giving them the freedom to talk or escape the torture. However, the problem with using these props is that sometimes they can cause harm, and so you have to be very careful not to tie the rope too tight around the victims wrists and ankles. A good tip for when using duct tape is to put masking tape on the other side and stick the masking tape to your face which makes it appear like the duct tape is stuck to the face, this reduces the pain when the tape is ripped off.
The final prop that I have been enjoying this month is candles. Candles are a really effective prop as not only do they provide a source of light, but they also have the connotation of relaxing, religion and peacefulness, which is a subverting stereotype as this completely juxtaposes the use of the torture weapons, tape, knife and rope. The flickering of the candle light mirrors the emotions being felt by the torture victim and the metaphor behind blowing out the candles is that another victim has been tortured and the lighting of the match symbolises the start of another torture session. I really like the hidden meaning and the symbols behind the prop of a candle as they can be used in two completely different ways to connotate different meanings. However, the limitation of using a candle is that they can effect the continuity of the scene if you use real candles because the wax levels will lower, and the limitation of using the battery operated candles is that they run out of battery very quickly and often they look very unrealistic.
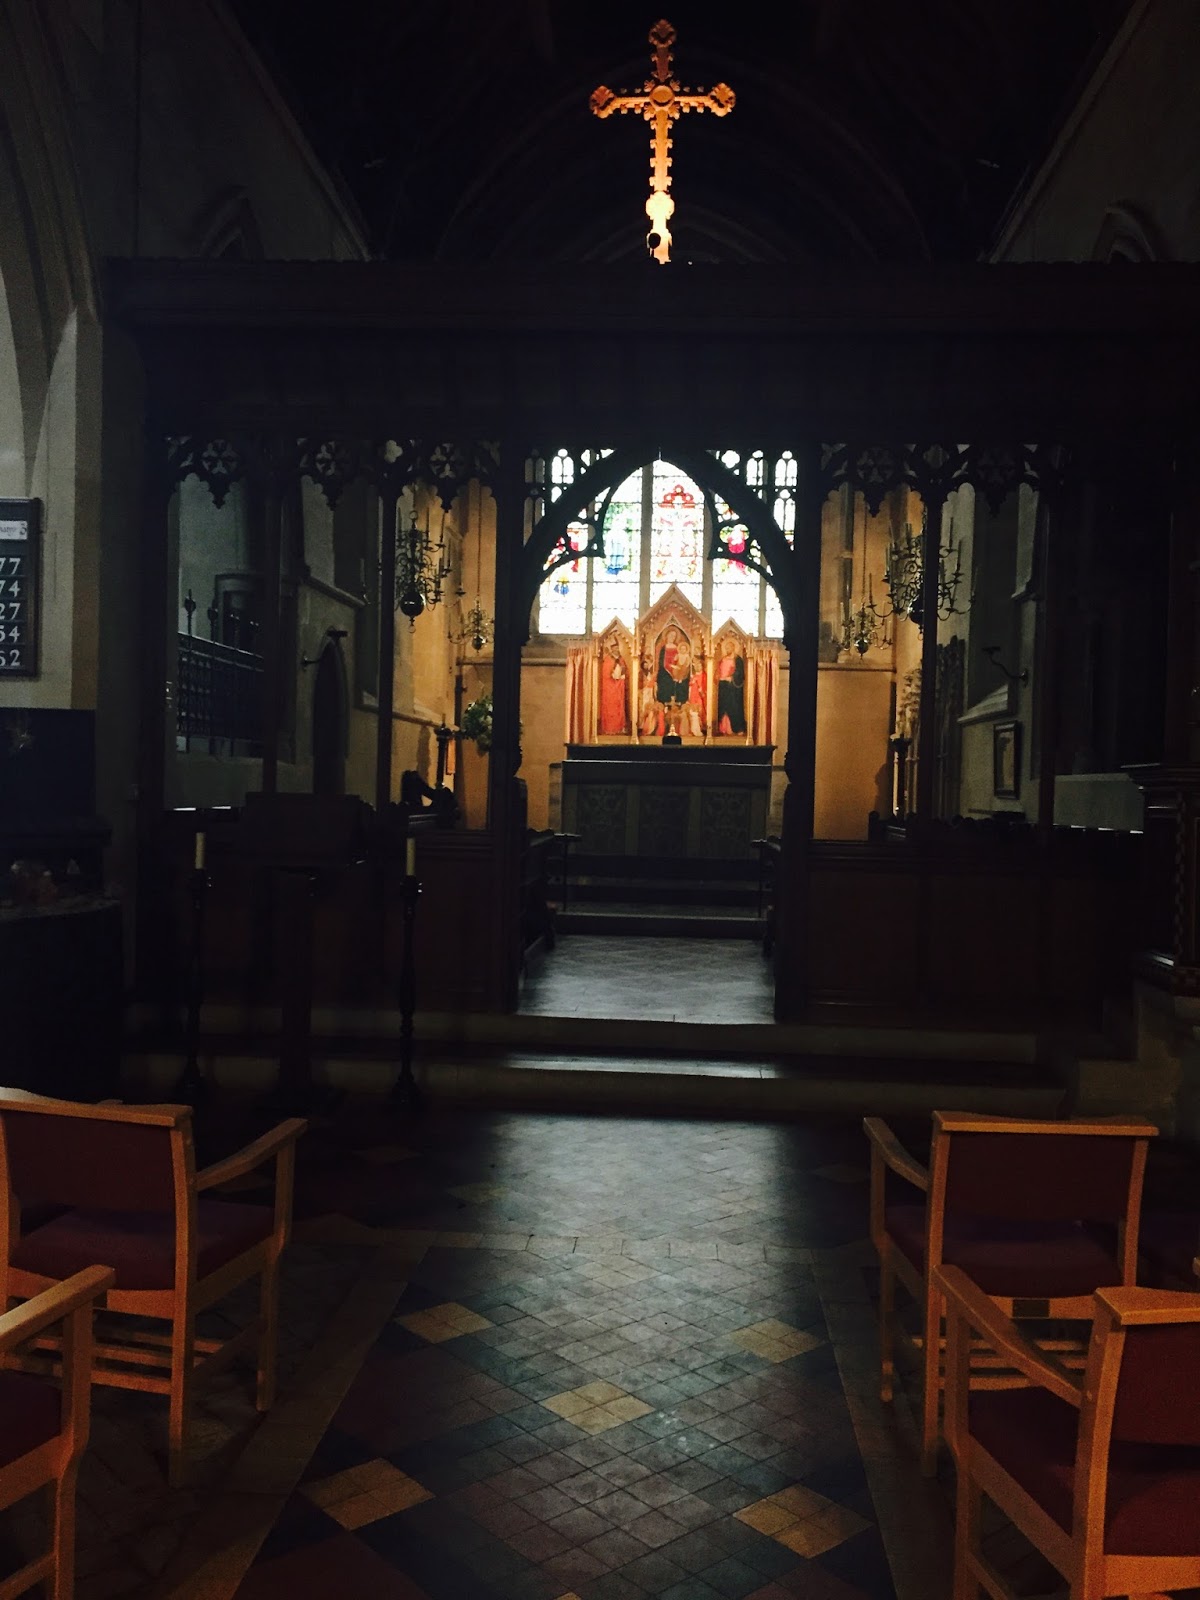
The next area of mise-en-scene that I have been enjoying this month is Location and Setting. The location that I am going to be talking to you about is a Church. A Church can provide a range of connotations due to the fact that it can either been seen as a religious and holy place of worship or a mysterious, creepy, haunted building with good acoustics and atmospheric lighting.
I decided to use a Church because I believe it provides connotations of mystery, paranormal or spiritual beings, religion, the presence of a greater being as well as a creepy, suspenseful and haunting atmosphere.
I believe that by using such a location it really enabled us to show the audience through the location, the feelings and emotions of the victim as well as the psychopath as the creepiness and haunting qualities could be seen and almost mirrored in the psychopath, whereas the purity, tranquility and holiness could be seen in the calmness of the negotiator/inspector and the innocence of the victim.
However, the issue with using a church as a location is that it is a place of worship and so some of the elements of a thriller film need to be checked and possibly adapted as to not be offensive to the church. Another problem with filming in a church is that most of the things within a church are actually from the 14th century therefore, they have a lot of sentimental value as well as being impossible to replace, therefore it is important to be very careful when filming inside this location.
Another disadvantage of using a Church for a location or setting is that they are usually very cold and therefore when you have actors that are only wearing a short white summer dress in the middle of winter, it can be very impractical and so it is important to bear this in mind when considering filming in a church.
Hey guys! I have also been loving mise-en-scene this November cause like Nanci said it’s perfect for this Halloween season, but I have been enjoying some different areas to Nanci.
The first area that has been one of my personal favourites this month is lighting. I’ve been really enjoying natural lighting as I feel like it really sets the mood for these more mysterious thriller type themes I’ve been loving. Sometimes using natural light can be tricky though because you can’t always see properly so it’s always good to carry extra lights around with you in case you need them to help you light certain things. If you’re in a certain location for example a Church, making use of the natural lighting is great because it has a very particular atmosphere which is perfect for adding tension but you can’t always see so I would recommend turning on some lights that might be available to you cause you don’t want everything to be pitch black!
I’ve also been obsessed with character positioning. This is one of my ultimate favourite areas of mise-en-scene because you can tell so much about people’s relationship with each other through it. To add to Nanci’s example of a psychopath and hostage situation I think a great Halloween look would be to have a hostage tied up to a chair for example and then the ‘psychopath’ standing up above the hostage victim because it would clearly show the victim’s vulnerability and the authority the psychopath has over her. You have to make sure that you can see everything because sometimes it can be tricky to get these two positions to work together. Maybe having someone else, like Nanci suggested a policeman standing further away could enhance the relationship because although he may be further away, he still has power as his movements are steady.
Facial expressions are something that are essential to mise-en-scene. I love that you can tell what someone is thinking through their facial expressions and what’s really on trend this month is the vulnerable scared look. This is perfect for a hostage or victim. All you have to do is breath heavily and keep looking away from anyone who you think may be a threat to you because then you appear frightened and like your life could be ended at any moment. A great contrasting facial expression for this if you prefer something a bit more psycho would be to smile a lot. This can become quite uneasy at points and confuse people because often the situations that you would not smile in, a psychopath would. So try and go against your instincts as being overly calm and happy through unblinking eyes and a wide smile can be very intimidating. You have to be careful though as it can look like you are just laughing- and no one wants that! If these two suggestions don’t float your boat why not try the authoritative policeman look. This is a very serious expression which works best on males. Having a serious yet calm facial expression gives you instant authority and lets everyone know that you are not to be messed with!
My final favourite is makeup. Makeup is so great because you can instantly tell a story with it. For men it isn’t as important because the facial expressions that I have also been loving are usually enough. For girls, especially ones that are into the hostage victim trend for this month, I would recommend creating some wounds and scratches on your face and possibly chest because it creates a back story and means people can imagine their own ideas of what happened to you without you telling them- this also adds an element of mystery. To pair with these wounds, I would recommend wearing minimal face makeup, just some foundation, mascara and blusher to give you a youthful, innocent glow. Bang on trend!
Mise-en-scene Video
In the following video, we explored how we made our choices for the different areas of mise-en-scene used in our thriller opening sequence.
The video explains how we used a range of subverting and adhering stereotypes as well as using connotations to provide character details. We also discussed the genre conventions used to allude to the thriller theme.
The video discusses all of the areas of mise-en-scene including character positioning, facial expressions, costumes, props, hair and makeup, location and setting and lightning.
Friday, 29 January 2016


Subscribe to:
Posts (Atom)