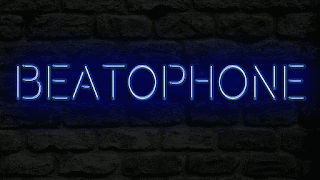
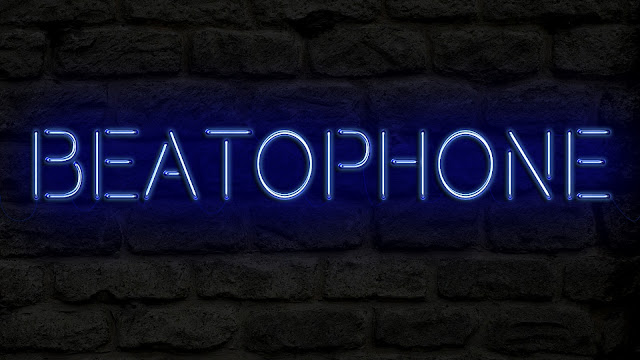
During our editing session on Friday I suggested that we could have some kind of text at the end of the music video, as we are having it fade to black. I suggested that we put a blinking neon sign reading "Beatophone". Due to the fact that we wouldn't be able to actually get that from anywhere, Evelyn decided to go ahead and create one using Photoshop.

To begin with, she created the text in all caps using the font Beon Medium from 1001 fonts. The colour she used was #89c8f4 and she then had to right-click on the layer and rasterized the type, which means that she transformed it from a vector-based file to a bitmap file. Then, using the Marquee Tool she went ahead and selected the horizontal lines from the font and separated them from the vertical lines, putting them on a different layer. She did this because what she did next was different for the horizontals and verticals. Evelyn the set both fill values to 0, which removed the colour from the text so the effect would spark up more.
She then duplicated the horizontal and verticals twice, as she said that this would create similar effects, however strengthen them on each layer to make the lines look 3D.
To start off, she went to the first horizontal layer and used the Bevel & Emboss with the following settings:
Size: 10
Unchecked the Use Global Light box
Angle: 0
Altitude: 70
Checked the Anti-aliased box
Highlight Mode: Linear Light
Shadow Mode - Opacity: 0%
This allowed her to create the blue base of the letters, on which she would then build up a glow and shine. She also created an Inner Shadow to create the blue hue. The settings she used were:
Blend Mode: Screen
Colour: #7aaef4
Angle: 30
Distance: 0
She also added an Inner Glow with the following settings:
Opacity: 85%
Colour: #7aaef4
Source: Center
Size: 18
And a Drop Shadow with these settings:
Distance: 13
Size: 7
Additionally, she then did similar things for the vertical lines, except for the fact that the following Bevel and Emboss settings changed to:
Angle: 90
Altitude: 74
In addition, she also changed the settings of Inner Glow:
Size: 15
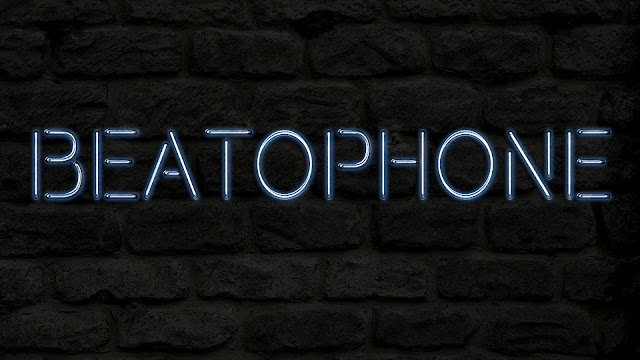
After this she then created a layer underneath the text and called it Background Light, changed it's blend mode to Linear Light and made the colour #264dda. She followed this up by going along with the brush tool and picked a soft and very large tip and then clicked behind the text to create a fuzzy and light look.
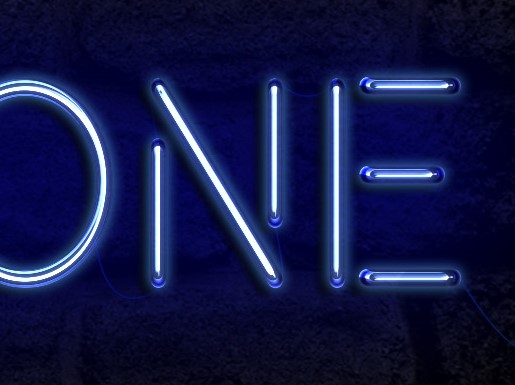
After that, Evelyn did one last thing to make the effect complete, which was adding cables combining the separate letters. She did this with the Pen tool and created a path. After she had created the design that we had envisioned, she went ahead and picked the brush tool, changed the settings to:
Brush Size: 2 px
Spacing: 1%
Hardness: 100%
She changed the colour to #3c30ba, picked the Direct Selection Tool, right-clicked the path and chose Stroke Path. This then coloured the path and created the cool wire effect.
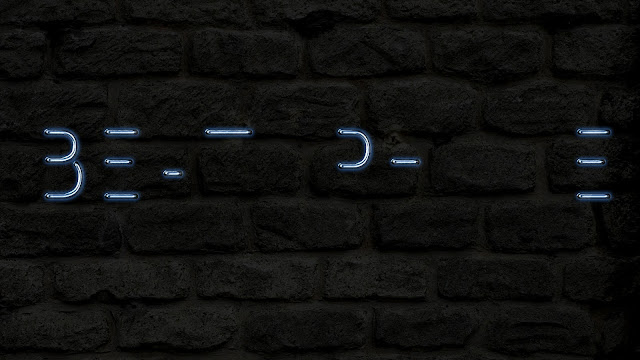
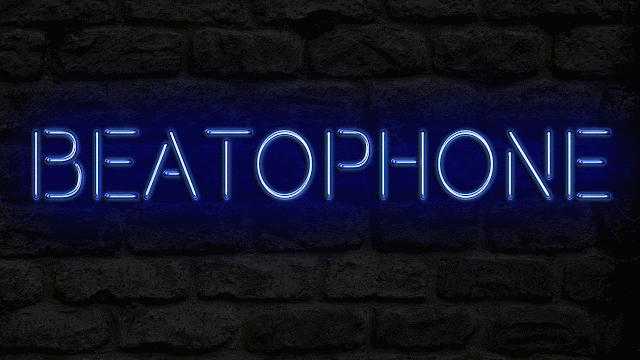
She followed this up with blackening out the entire text to make the neon sign to appear off, and then made it so that half the sign was turned on. This allowed us to create the effect of it blinking.
In Version 1 she repeated the on-to-off pattern, and kept it on for a little while, however during our group discussion she revealed the fact that she felt like this didn't look too good. Therefore in Version 2 we decided to switch the pattern to:
On
Half-Off
On
Off
On
Half-Off
Off
On
On
On
On
Off
On
After a group discussion regarding the outcome of this we discovered that version 2 was going to be much more effective for the ending of our music video due to the fact that it created a much more unpredictable pattern. I think that the neon sign effect turned out really well and it looks very effective and funky. I think that the use of the colour blue will work well with the rest of our music video because blue is used within the futuristic section as part of the lighting effect as well as being one of the colours used for the dancers' makeup.I think that this will provide a brilliant ending for our music video and it will look effective after the fade to black transition.
This is version 1:

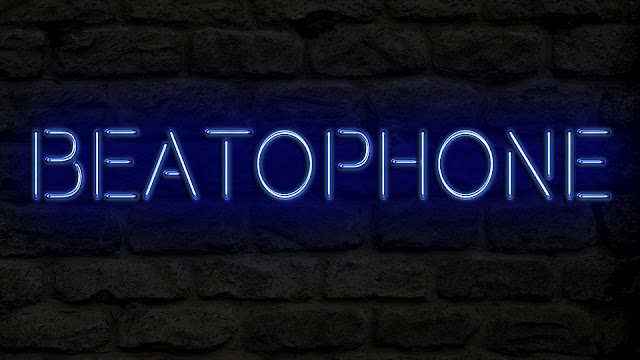
This is version 2:
No comments:
Post a Comment